
Uploading Files via cPanel File Manager
Note: If your website consists of a single file, you can upload it directly. If you have multiple files and folders, you must compress them into a .zip archive. Files with extensions like .rar or .7z are not supported for extraction in File Manager.
- Prepare your files: Select your website files and folders, right-click, and compress them into a .zip file.
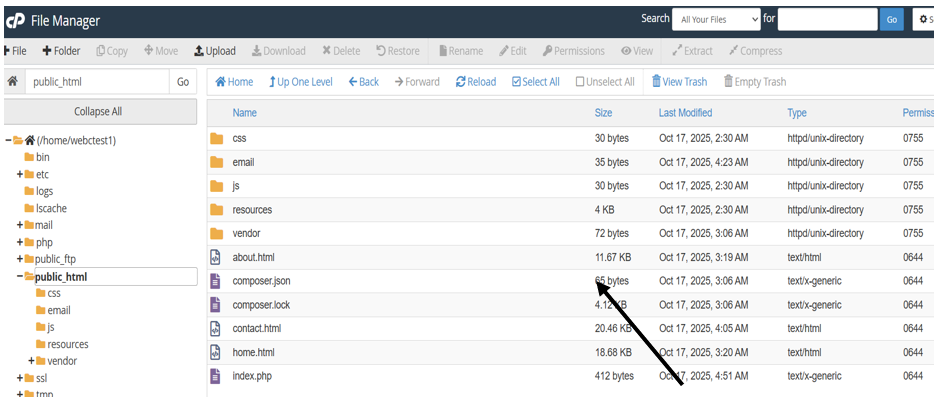
- Access File Manager: Log in to your cPanel dashboard and click on the File Manager icon.
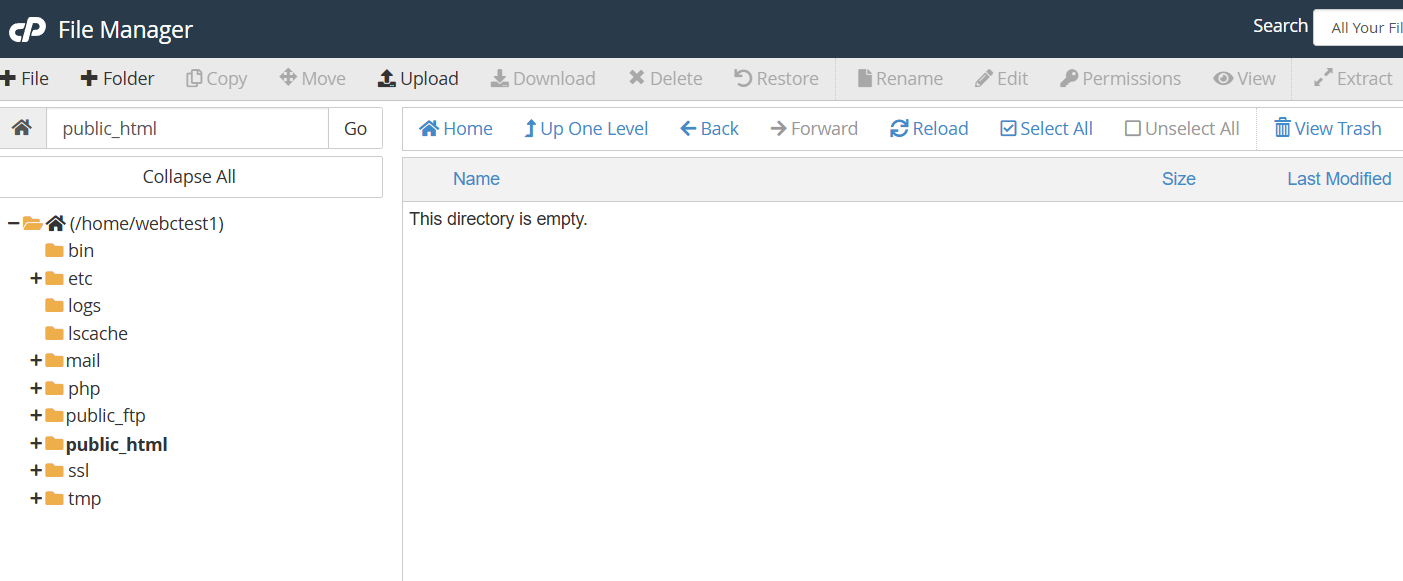
- Open public_html: On the left-hand sidebar or in the main window, double-click the public_html folder. This is where your website files must live to be visible online.
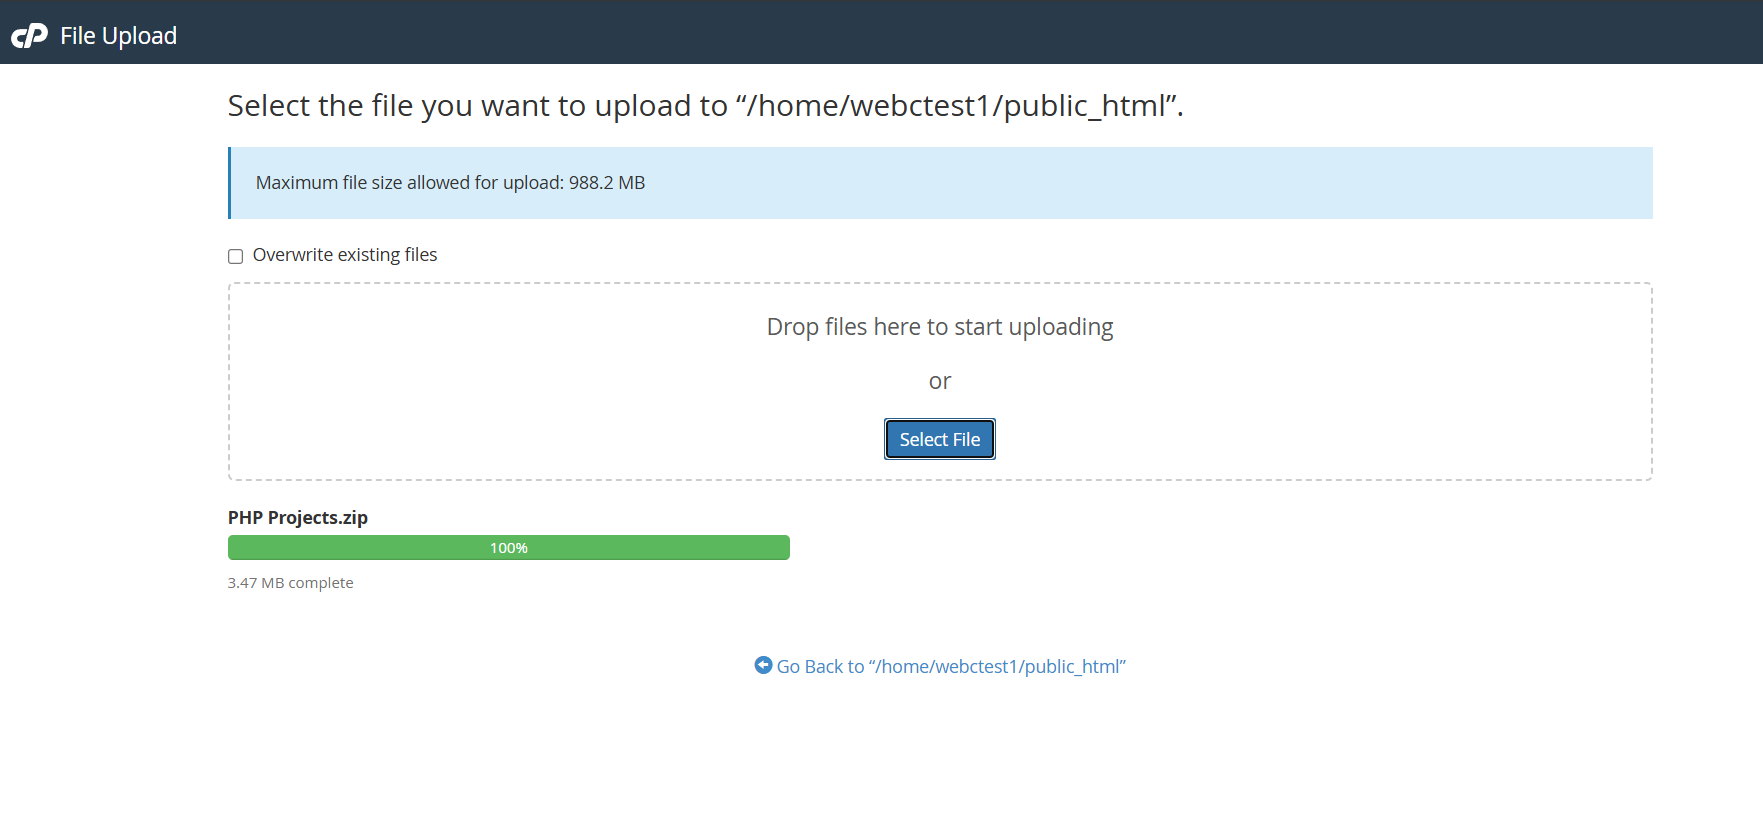
- Launch Upload: Click the Upload button located in the top toolbar.
- Select Your File: Click Select File in the new tab that opens, and navigate to your prepared .zip file.
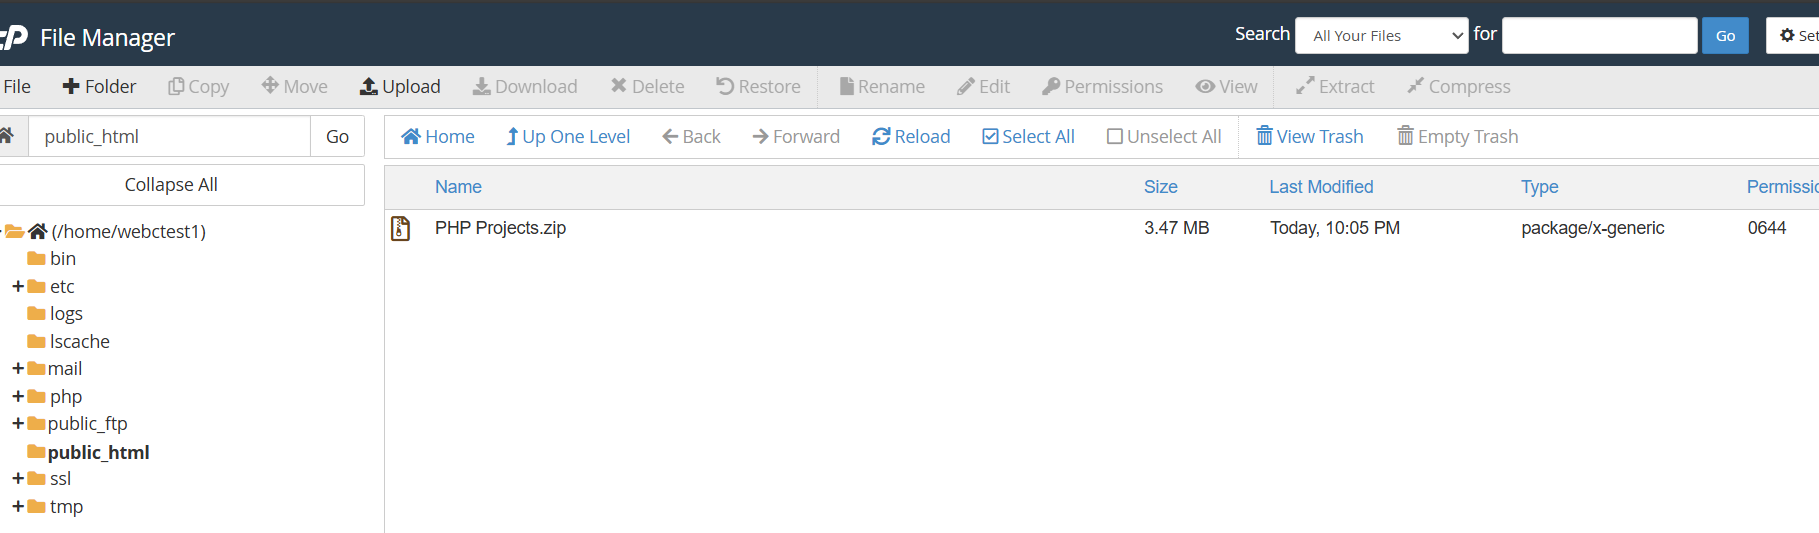
- Wait for Completion: The upload progress bar will turn green when finished. Once done, click the Go back to... link at the bottom of the page.
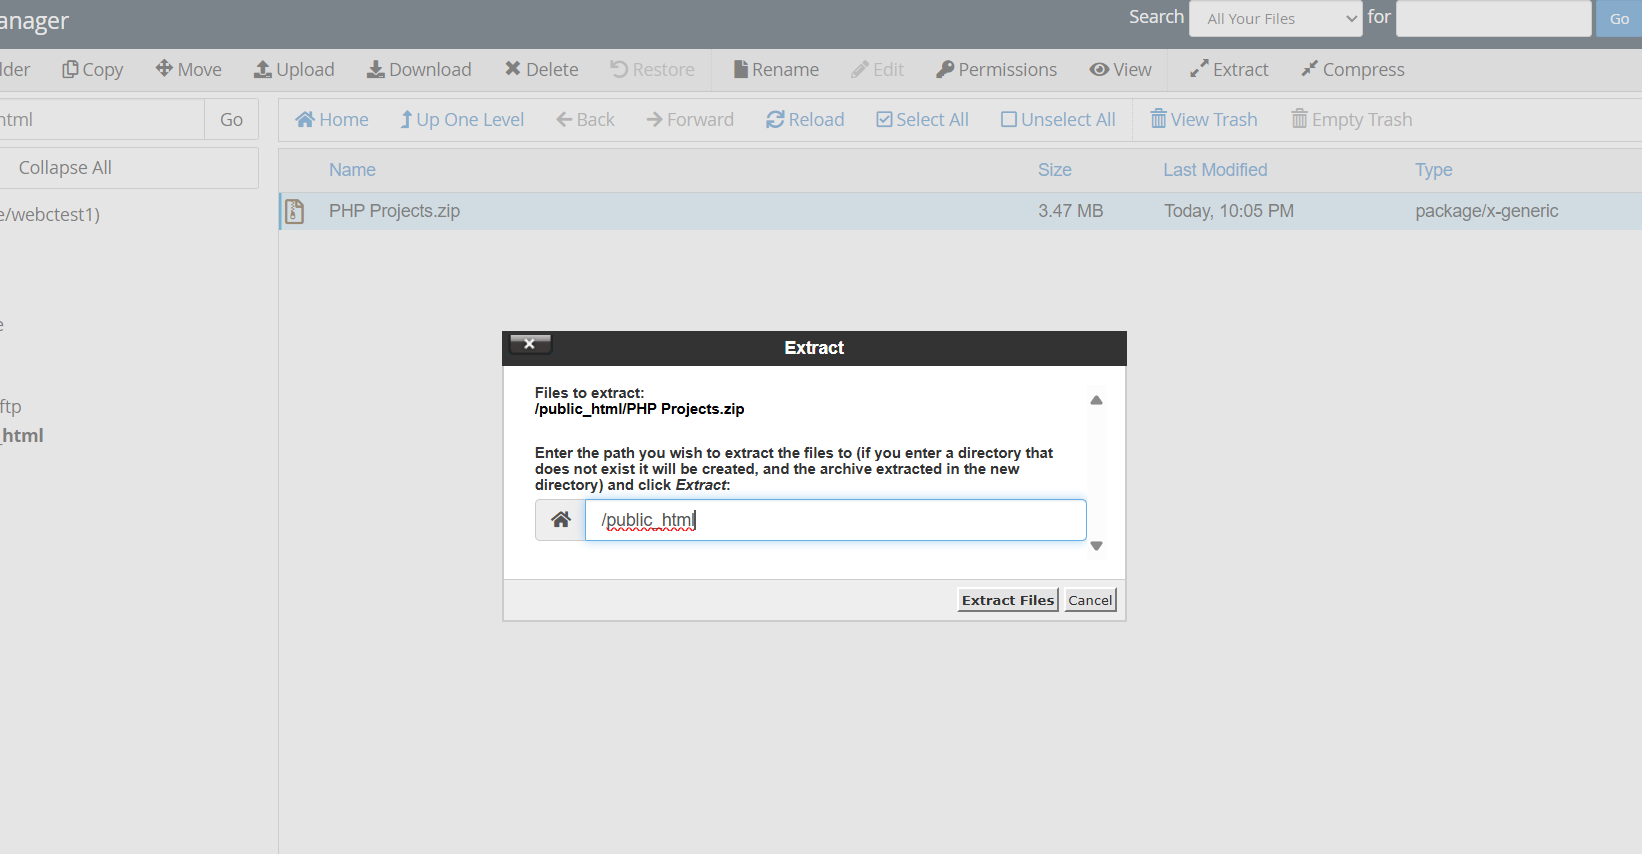
- Extract the Files: * Right-click the uploaded .zip file in File Manager. Select Extract from the menu. Confirm the extraction path is /public_html and click Extract Files.
-
Your website will now be live after extraction!
Uploading Files using Filezila
FileZilla is a powerful, open-source FTP client available for Windows, macOS, and Linux. While the cPanel File Manager is great for small tasks, FileZilla is the preferred tool for uploading a large number of files or very large file sizes, as it is more stable and prevents upload timeouts.
It supports secure connections including SFTP and FTPS to ensure your data remains protected during transfer.
cPanel accounts include a system FTP account, which provides access to manage all files in your home directory. The password for this system account is the same for both cPanel and FTP access.
For maximum security, use FTPS (Explicit FTP over TLS) when connecting to your server.
Important: Do not attempt to use SFTP (SSH) unless you have specifically requested that SSH be enabled for your account and you are using the correct port. Unauthorized SFTP connection attempts will result in our firewalls automatically blocking your IP address.
Setup Instructions
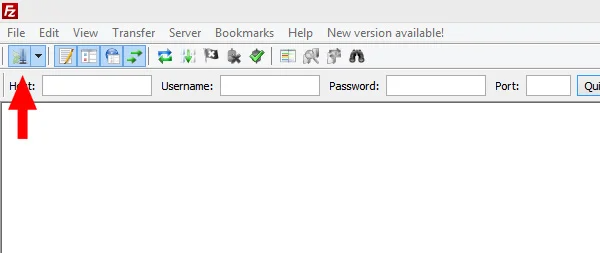
- Open Site Manager: Open FileZilla and click the Site Manager icon located in the top-left corner of the toolbar.
- Configure Connection Settings: In the Site Manager window, click New Site and enter the following settings:
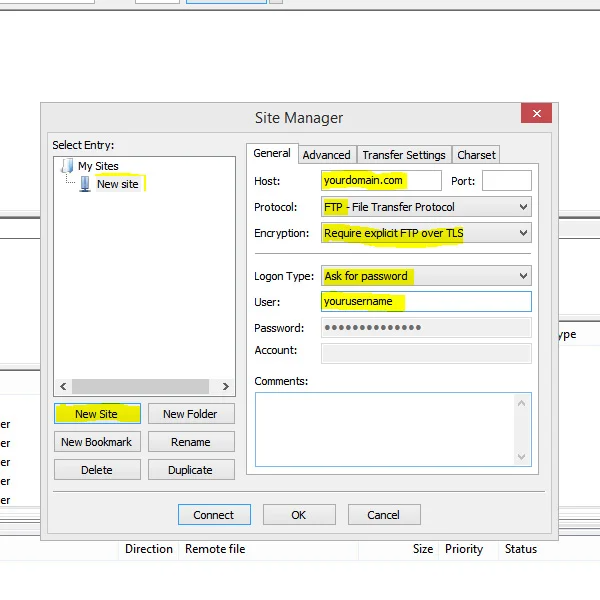
- Protocol: Select FTP - File Transfer Protocol.
- Host: Enter your domain name (e.g., yourdomain.co.zw).
- Encryption: Select Require explicit FTP over TLS.
- Logon Type: Ask for password.
- User: Enter your cPanel username.
- Password: Enter your cPanel password
If the configuration is correct, FileZilla will establish a secure connection over FTPS, allowing you to manage your files safely.