Creating Email Accounts
All Webzim hosting accounts include email services. The number of email addresses you can create depends on your specific plan. To view your plan's limits, visit webzim.co.zw.
Step-by-Step Setup:

- Access Email Settings: Log in to your cPanel and navigate to the Email section. Click on Email Accounts.
- Start Creation: Click the + Create button on the right-hand side.
- Enter Credentials:
- Username: Enter the prefix you want (e.g., info or sales).
- Password: Enter a strong password for the account.
- Click "Edit Settings" under the Optional Settings section.
- To Limit: Enter a specific storage size (e.g., 500 MB).
- For No Limit: Select "Unlimited." This ensures the mailbox size is only restricted by your total hosting account capacity.

Success!
Once finished, you will see a notification: "Success: You created [email address]." Your new email will now appear in the list of active accounts.
Note on Storage Limits: > By default, all new email accounts are assigned a 250MB storage limit. To change this, click "Edit Settings" during setup. You can increase this to a specific amount (e.g., 500MB) or select "Unlimited." Choosing "Unlimited" removes the storage cap on your individual inbox, allowing it to use any available space remaining in your overall hosting account.

How to Access Your Emails
There are 4 primary ways to access your email accounts. We recommend using Thunderbird for desktop computers as it is the most user-friendly and easiest to configure.
Important: Please ensure you have already created your email accounts in cPanel before attempting these setup methods.
Access Methods
|
Method |
Platform |
Recommended Application |
|
Web Browser |
Desktop & Mobile |
Webmail (No installation required) |
|
Mobile App |
Smartphone/Tablet |
Bluemail (Available on App Store/Play Store) |
|
Computer App |
PC or Mac |
Thunderbird (Recommended) |
|
Computer App |
PC or Mac |
Microsoft Outlook |
Method 1 – Access Email via Webmail
(Can be accessed via any web browser eg via phone, computer etc)
Webmail allows you to access your email from any web browser on any device (phone, computer, or tablet) without installing additional software.

Step-by-Step Instructions:
- Visit the Login Page: Go to yourdomain.co.zw/webmail (replace "yourdomain.co.zw" with your actual domain name).
- Log In: Enter your full email address and password, then click Log in.
- Open Your Inbox: Under the "Open your Inbox" section, click the Roundcube icon.
- Set as Default: To skip this screen in the future, check the box labeled "Open my inbox when I log in" and click Open.
Once this is set, you will be taken directly to your inbox to send and receive messages every time you log in.
Method 2 – Access Email via Mobile/Phone Application
This method is compatible with Android and iOS devices (e.g., Samsung, Apple iPhone, Huawei, LG, Lenovo, etc.). While many apps like Outlook are available, this guide focuses on BlueMail for its ease of use.
Installation: Search for BlueMail in your device's app store or use the direct links below:
- Android (Google Play Store): Download BlueMail
- iOS (Apple App Store): Download BlueMail
Direct Links: https://play.google.com/store/apps/details?id=me.bluemail.mail and https://itunes.apple.com/us/app/blue-mail-email-mailbox/id1063729305
Note: If you prefer to use a different application, you can use the Manual Settings provided in the section below.

Install the application on your phone and open BlueMail. Click the Add Account button. On the account type selection screen, click Other Email at the bottom of the list. Enter your full email address (e.g., [email protected]) and your account password. Then select “Other Email” option.

Select “Other Email”


IMPORTANT! Untick the automatic box. Click Next.

Click IMAP. You will then see the Incoming Server Settings screen.
Incoming Server Settings:
Enter the following details exactly as shown:
Email Address: Ensure your full email address is entered (e.g., [email protected]).
Username: Ensure your full email address is entered (e.g., [email protected]).
Password: This is the password you previously entered; leave it as it is.
IMAP Server: Enter mail.yourdomainname.co.zw [Replace yourdomainname.co.zw with your actual domain name]
Security: Select SSL/TLS
Authentication: Select PLAIN
Port: Ensure the port number is 993

Click Next to proceed to the Outgoing Server Settings
Outgoing Server Settings:
Enter the following details exactly as shown:
SMTP Server: Enter mail.yourdomainname.co.zw [Replace yourdomainname.co.zw with your actual domain name]
Security: Select SSL/TLS
Port: Ensure the port number is 465
Require Sign In: Ensure this checkbox is ticked
Authentication: Select LOGIN
Username: Ensure your full email address is entered (e.g., [email protected])
Password: This is the password you previously entered; leave it as it is

Click Next. The application will now verify your settings.
If the setup is successful, you will be prompted to enter your Name (the name recipients will see when they receive your emails) and a Description (a nickname to help you identify the account if you add multiple email addresses). Enter the information and click Done.
Under Instant Push Notifications, leave the Push option selected and click Done. If a Welcome Tutorial appears, you can click Skip in the top-right corner to go directly to your inbox.
To add another email address: open BlueMail, click the three dots in the lower-right corner, select Various Account Settings, click Accounts, and then click Add Account.
For a complete guide on using the application, visit the BlueMail Help Center or BlueMail Tutorial ( https://bluemail.help/category/general-help/ or https://bluemailtutorial.com/). After completing the setup, please send a test email to ensure you can send and receive messages successfully.
Method 3 – Access via Computer Application – Thunderbird
This method is for use with desktop computers and laptops. Thunderbird is our recommended application for its reliability and ease of setup.
Installation: Download and install Thunderbird from the official link: https://www.thunderbird.net/en-US/download/
Setup Instructions:
Open Thunderbird. If this is your first time using it, a window titled Set up an Existing Email Account will appear automatically.
If you already have Thunderbird installed and do not see this popup: click the Menu button (three horizontal lines) in the top-right corner, select New, and then click Existing Mail Account.
In the Set up an Existing Email Account window, enter the following:
Full Name: The name you want recipients to see when they receive your emails.
Email Address: Your full email address (e.g., [email protected]).
Password: Your account password.
Keep the Remember password box ticked, then click Configure manually. You will then see the settings section below:

Keep the Remember password box ticked, then click Configure manually. You will then see the settings section below:

Incoming Server Settings:
Enter the below settings
Protocol: IMAP
Hostname: mail.yourdomainname.co.zw [Replace yourdomainname.co.zw with your actual domain name]
Port: 993
Connection security: SSL/TLS
Authentication method: Normal Password
Username: Enter your full email address (e.g. [email protected])
Outgoing Server Settings:
Enter the below setting
Hostname: mail.yourdomainname.co.zw [Replace yourdomainname.co.zw with your actual domain name]
Port: 465
Connection Security: SSL/TLS
Authentication method: Normal Password
Username: Enter your full email address (e.g. [email protected])
Once these details are entered, verify they match your account information (replacing the example email with your actual email address). Click Done, and then click Finish on the following page.
Close Thunderbird and reopen it. Your newly added email account will now appear in the sidebar. Click on your email address to begin writing and receiving messages.
For a complete guide on Thunderbird and its various features, visit the Thunderbird Basics Guide at: https://support.mozilla.org/en-US/products/thunderbird/learn-basics-get-started

To add additional email accounts to Thunderbird, follow these steps:
- Open the Menu: Click on the Menu button (represented by three horizontal lines) in the top-right corner of Thunderbird.
- Access Settings: Click on Options, then select Account Settings.
- Add New Account: Locate the Account Actions button at the bottom of the window that pops up and click it.
- Select Mail Account: Click on Add Mail Account.
- Configure: Follow the configuration instructions provided in the previous section again to complete the setup.
If you face any challenges, please contact us for assistance.
Method 4 – Access via Computer Application – Microsoft Outlook
Microsoft Outlook has several versions. This guide provides the setup process for Outlook 2007, 2010/2013, and 2016.
Outlook 2007 Settings
- If you already have Outlook emails, open Outlook, click on Tools, then select Account Settings. You will see the below

Click on New, then Click on Next. Don’t enter your details, just Click/Tick on Manually Configure server settings or additional server types then click Next. Skip to step 3 for further instructions.
2. If you don’t have any email setup in your Outlook, you will see the below, when you open Outlook

Click Next.

Select Yes and click NEXT.

Don’t enter your details, just Click on Manually Configure server settings or additional server types then click Next.
3. Choose the Internet Email option, and click Next.


4. Settings
Your Name: Enter the name you want recipients to see when they receive your emails.
Email Address: Your full email address (e.g., [email protected]).
Account Type: Select IMAP. (Note: We recommend IMAP because it allows you to sync and access your emails from multiple devices simultaneously, whereas POP3 does not.)
Incoming Mail Server: mail.yourdomainname.co.zw [Replace yourdomainname.co.zw with your actual domain name]
Outgoing Mail Server (SMTP): mail.yourdomainname.co.zw [Replace yourdomainname.co.zw with your actual domain name]
Username: Your full email address (e.g., [email protected]).
Password: Your account password.
Remember Password: Ensure this box is ticked.
After entering these details, click the More Settings button located in the bottom-right corner. A new window will pop up.

Click on Outgoing Server.

On the Outgoing Server tab, configure the following:
My Outgoing server (SMTP) requires authentication: Ensure this box is ticked/selected.
Use same settings as my incoming mail server: Ensure this option is selected.
Once these are set, click on the Advanced tab at the top.

In the Advanced tab, enter the following settings:
Incoming Server: Enter 993 (Recommended IMAP option) or 995 (if using POP3).
Encrypted Connection: Under "Use the following type of encrypted connection," select SSL. (Note: On some Outlook versions, you may see a checkbox labeled "This server requires an encrypted connection (SSL)." Ensure this is ticked.)
Outgoing Server (SMTP): Enter 465.
Encrypted Connection (Outgoing): Select SSL.
Important: Double-check that the Outgoing Server (SMTP) port is still set to 465. If the number changed automatically after selecting SSL, manually enter 465 again.
After confirming these settings, click OK.
On the main screen, click Test Account Settings. (Note: If your version of Outlook does not have this button, simply click Next to proceed.)

A window will pop up to test your configuration. If your settings are correct, the status for both tasks will be shown as Completed.
If the status shows Failed for either task, please double-check your settings by going through this guide again. You should also verify that your password is correct.
Click Close on the Test Account Settings popup, then click Next. You will then see a "Congratulations" message confirming your account has been set up successfully.

Click on Finish.
You will then be taken to your Outlook dashboard, which will begin loading and downloading your messages from the server.
You may see a prompt asking if you want to allow Outlook to be the default for all email and contacts. Click No.

When sending your first email, a message may appear asking you to select a folder for sent items.
Click Use Default Folder.
Outlook 2010/2013 Settings
1. Open Outlook and click File

2. Click Add Account

3. Don’t enter your details, just Click/Tick on Manual setup or additional server types then click Next.

4. Choose the “Internet E-mail” option, and click “Next”.

5. Internet E-mail Settings

Internet E-mail Settings
Enter the following information into the setup window:
Your Name: Enter the name you want associated with this email account.
Email Address: Your full email address (e.g., [email protected]).
Account Type: Select IMAP.
(Note: We recommend IMAP as it allows you to access and sync your emails across multiple devices. POP3 does not support multi-device syncing.)
Incoming Mail Server: mail.yourdomainname.co.zw [Replace yourdomainname.co.zw with your actual domain name]
Outgoing Mail Server (SMTP): mail.yourdomainname.co.zw [Replace yourdomainname.co.zw with your actual domain name]
User Name: Your full email address (e.g., [email protected]).
Password: Enter your email account password.
Remember Password: Ensure this box is ticked.
Click on More Settings which is on the bottom right. The below will pop up

6. Click on Outgoing Server

Tick/Select on “My Outgoing server (SMTP) requires authentication” as shown above
Make sure “Use same settings as my incoming mail server” is selected as shown above.
7. Click on Advanced

In the Advanced tab, configure your port and encryption settings as follows:
Incoming Server: * If using IMAP (recommended), enter 993. If using POP3, enter 995.
Encrypted Connection: Under "Use the following type of encrypted connection," select SSL.
(Note: In some versions of Outlook, you must tick the box labeled "This server requires an encrypted connection (SSL).")
Outgoing Server (SMTP): Enter 465.
Encrypted Connection (Outgoing): Select SSL.
Important: Check the Outgoing Server (SMTP) port one last time to ensure it is still 465. If it changed automatically after you selected SSL, manually type 465 back in.
Once these fields are correct, click OK.
On the following screen, click Test Account Settings.
(Note: If your version of Outlook doesn't show this button, simply click Next to finish the process.)

A window will pop up to test your connection. If your settings are correct, the status for both tasks will be marked as Completed.
If the status shows Failed for either task, please double-check your settings by following this guide again. You should also verify that your password has been entered correctly.
8. Click Close on the Test Account Settings Popup. Then click on Next. You will then see the below Congratulations message.

9. Click on Finish. You will then be taken to your Outlook, which will then load and
download your messages from the server
Outlook Classic Settings (2016 – 2021)
This guide walks you through adding your email account to Outlook Classic using IMAP, and then updating the server settings to ensure your emails send and receive correctly.
Part 1: Adding Your Email Account
Step 1: Open Outlook Classic
Open Outlook (Classic) on your computer.
If this is your first time opening Outlook, the account setup wizard will launch automatically. If not, go to File > Add Account to begin.
Step 2: Enter Your Email Address
- In the Email Address field, type your full email address.
- Before clicking Connect, click on Advanced options (the small link just below the email address field) to expand it.
- Tick the checkbox that says Let me set up my account manually.

Click Connect.
Step 3: Choose Your Account Type
On the account type selection screen, select IMAP.

Step 4: Enter Your Account Password
Enter your email account password when prompted.

Click Connect to proceed.
Once Outlook has verified your details, you will see an Account successfully added notification. Click Done.
Important: This is not the end of the setup. You will need to manually update the server settings in the next section to ensure your emails work correctly.
Part 2: Updating Server Settings
After adding the account, follow the steps below to configure the correct incoming and outgoing server settings.
Step 1: Open Server Settings
- Open Outlook .
- Click File in the top-left corner.
- Under the Account Information section, you will see a dropdown showing your email accounts — select the email account you want to update.
- Click Account Settings.


- Click Server Settings.
- The IMAP Account Settings popup will appear.
Step 2: Update the Server Settings
Update the incoming and outgoing server details as follows:
Incoming Mail Server Settings:
- Server: mail.yourdomainname.co.zw [Replace yourdomainname.co.zw with your actual domain name]
- Port: Enter 993 (for IMAP, recommended) or 995 (if using POP).
- Encryption Method: Select SSL/TLS.

Outgoing Mail Server Settings:
- Server: mail.yourdomainname.co.zw [Replace yourdomainname.co.zw with your actual domain name]
- Port: Enter 465.
- Encryption Method: Select SSL/TLS.

Step 3: Save and Test
Click Next after entering all server settings.
Outlook will test the connection to both the incoming and outgoing servers.
Once both tests pass, click Done to save the settings.
Outlook Latest App Settings
Open Outlook and enter the email address.
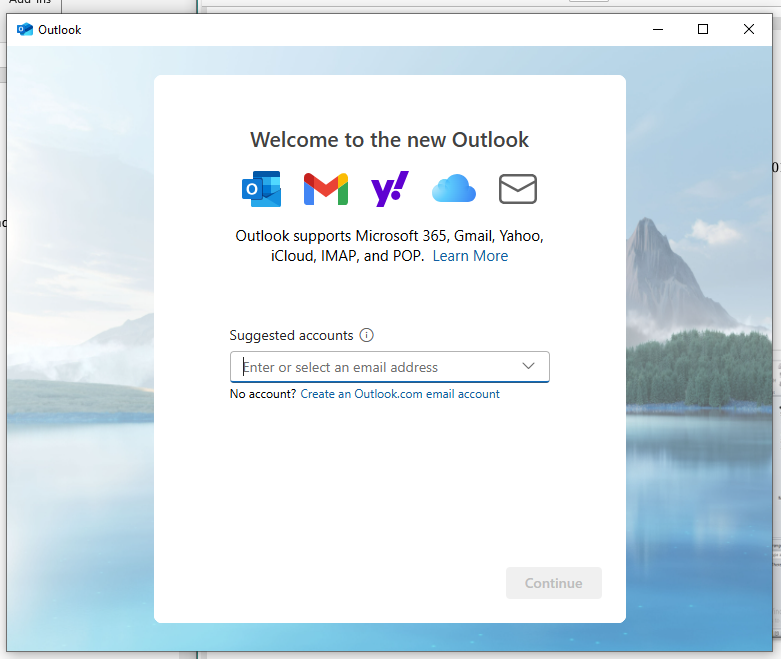
Enter password and click show more

Enter the below settings on the screen which appears


Incoming Mail Server Settings:
- Server: mail.yourdomainname.co.zw [Replace yourdomainname.co.zw with your actual domain name]
- Port: Enter 993 (for IMAP, recommended) or 995 (if using POP).
- Encryption Method: Select SSL/TLS.
Outgoing Mail Server Settings:
- Server: mail.yourdomainname.co.zw [Replace yourdomainname.co.zw with your actual domain name]
- Port: Enter 465.
- Encryption Method: Select SSL/TLS.
Click Continue to proceed.


If the instructions provided above are not compatible with your specific version of Outlook, or if you encounter any difficulties during the setup process, please get in touch with us and we will assist you.
